Share A Refund makes it easy to attach sales reps (or agents) to customer accounts through user roles and the Linked User feature. This article outlines how to add a customer to a sales agent.
Add customer to sales rep
- Log in to admin account.
- Navigate to the left sidebar and tap Users.
- Tap on the required sales agent.
- Go to Edit User page of the sales agent and attach a customer to the account.
- Once attached, the sales rep can impersonate the customer.
Attach sales rep to customer account
- Sign in to your admin account.
- Navigate to left sidebar and tap on Users.
- Locate the customer in the window.
- Tap Login as User button.
- Once impersonating the customer, move to the left sidebar and tap Settings.
- Navigate to the Invite Users card.
- List the sales rep email addresses that require access.
- Tap Invite button.
- Repeat the steps for each sales rep.
Note: A unique email address is required on each account. Duplicate sales rep email addresses cannot be listed on multiple accounts.
Use Gmail features to create multiple email addresses
Gmail makes it possible to create unlimited email addresses. Use the plus method to create unique email addresses for each sales rep.
Assign a Sales Agent
Merchants now have the ability to assign a sales agent within the Edit User page for a given customer’s account.
- Sign in to your admin account.
- Tap Users on the left sidebar.
- Select customer’s account.
- Assign a sales agent.

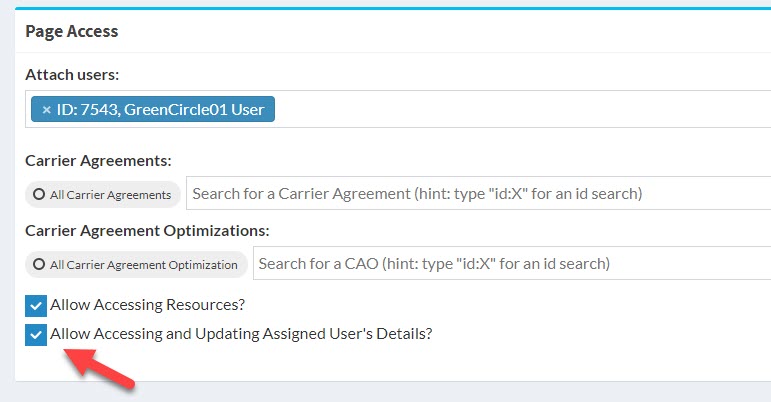
Options available
There are two checkboxes available to an admin that can be selected for a Sales Agent role type. Each is listed below:

Next steps for sales reps
- Email notifications are sent to the indicated email addresses.
- The sales rep clicks on the button within the email to officially attach their email address to the customer account.
- The sales rep is added to the customer account automatically once registered. No further action is required.
If you need to delete or disable a sales rep on a customer account, read the directions listed in this support topic.